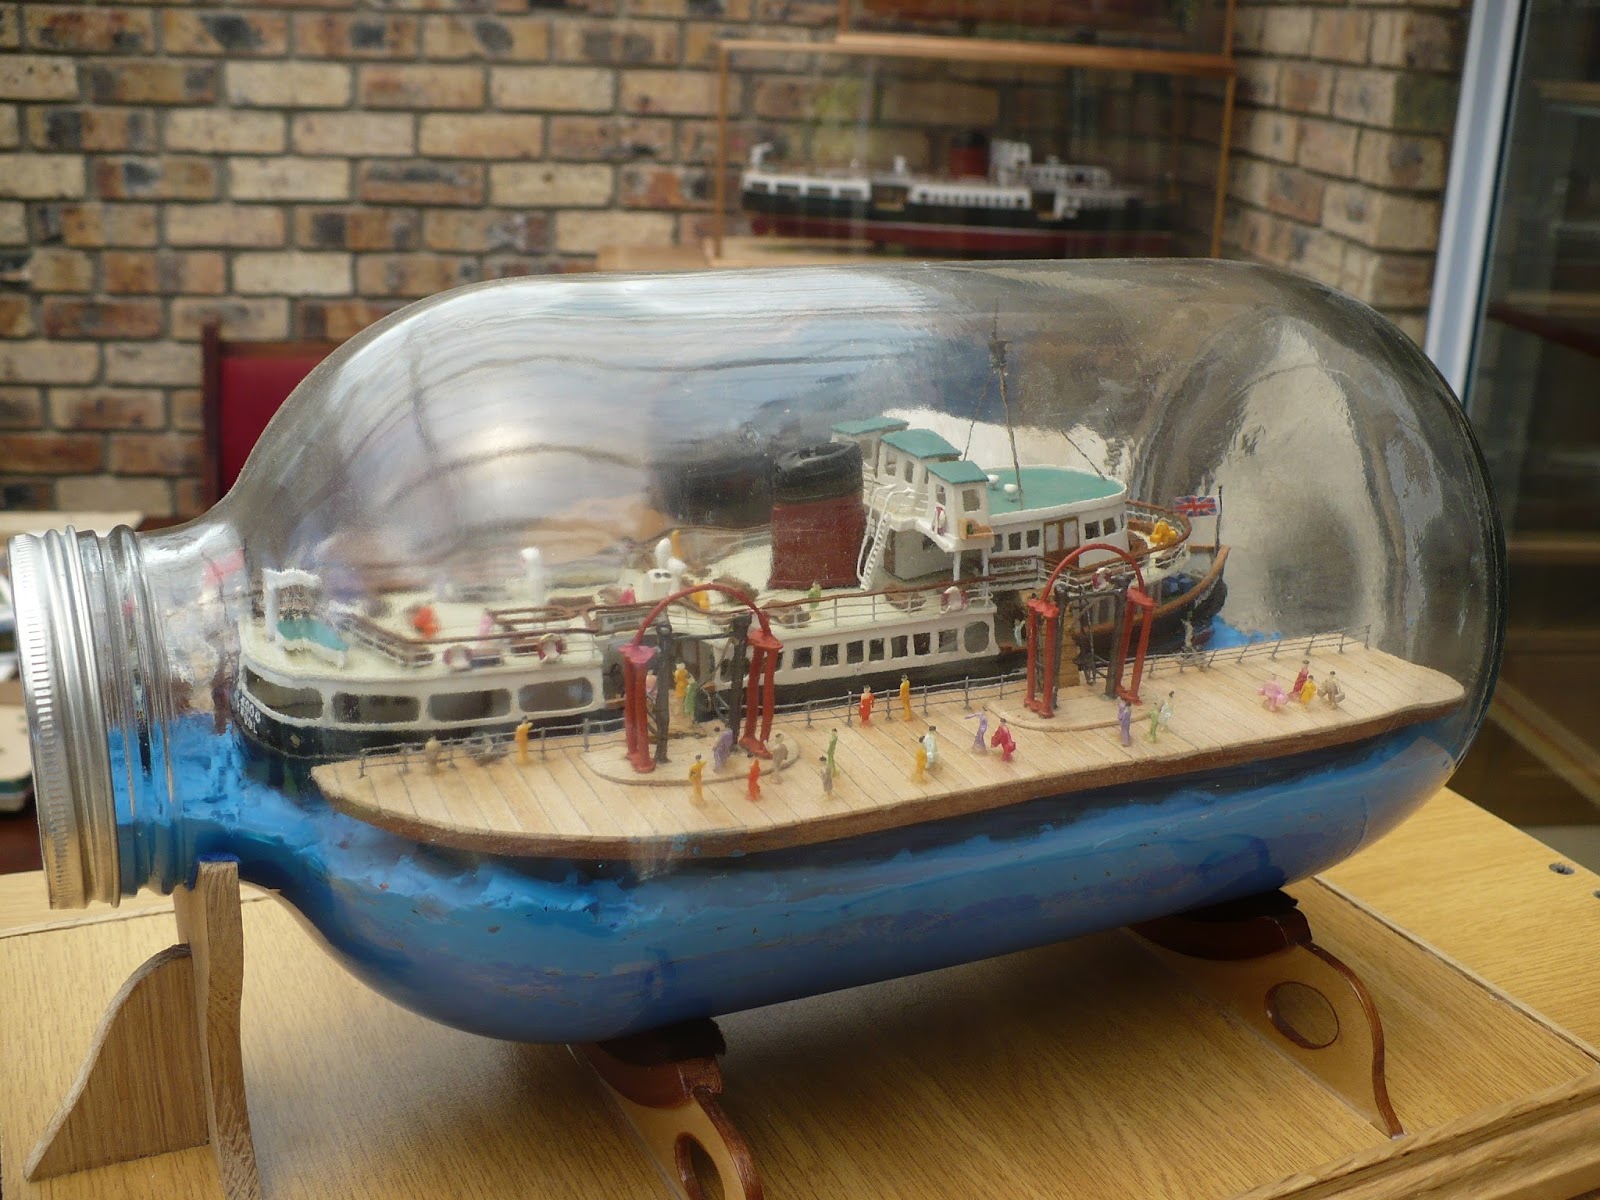
As usual, after building a model ship, I decided to
duplicate it in a bottle.
I decided this time to build it alongside the ferry
landing stage, with passengers boarding via the aft gangway.
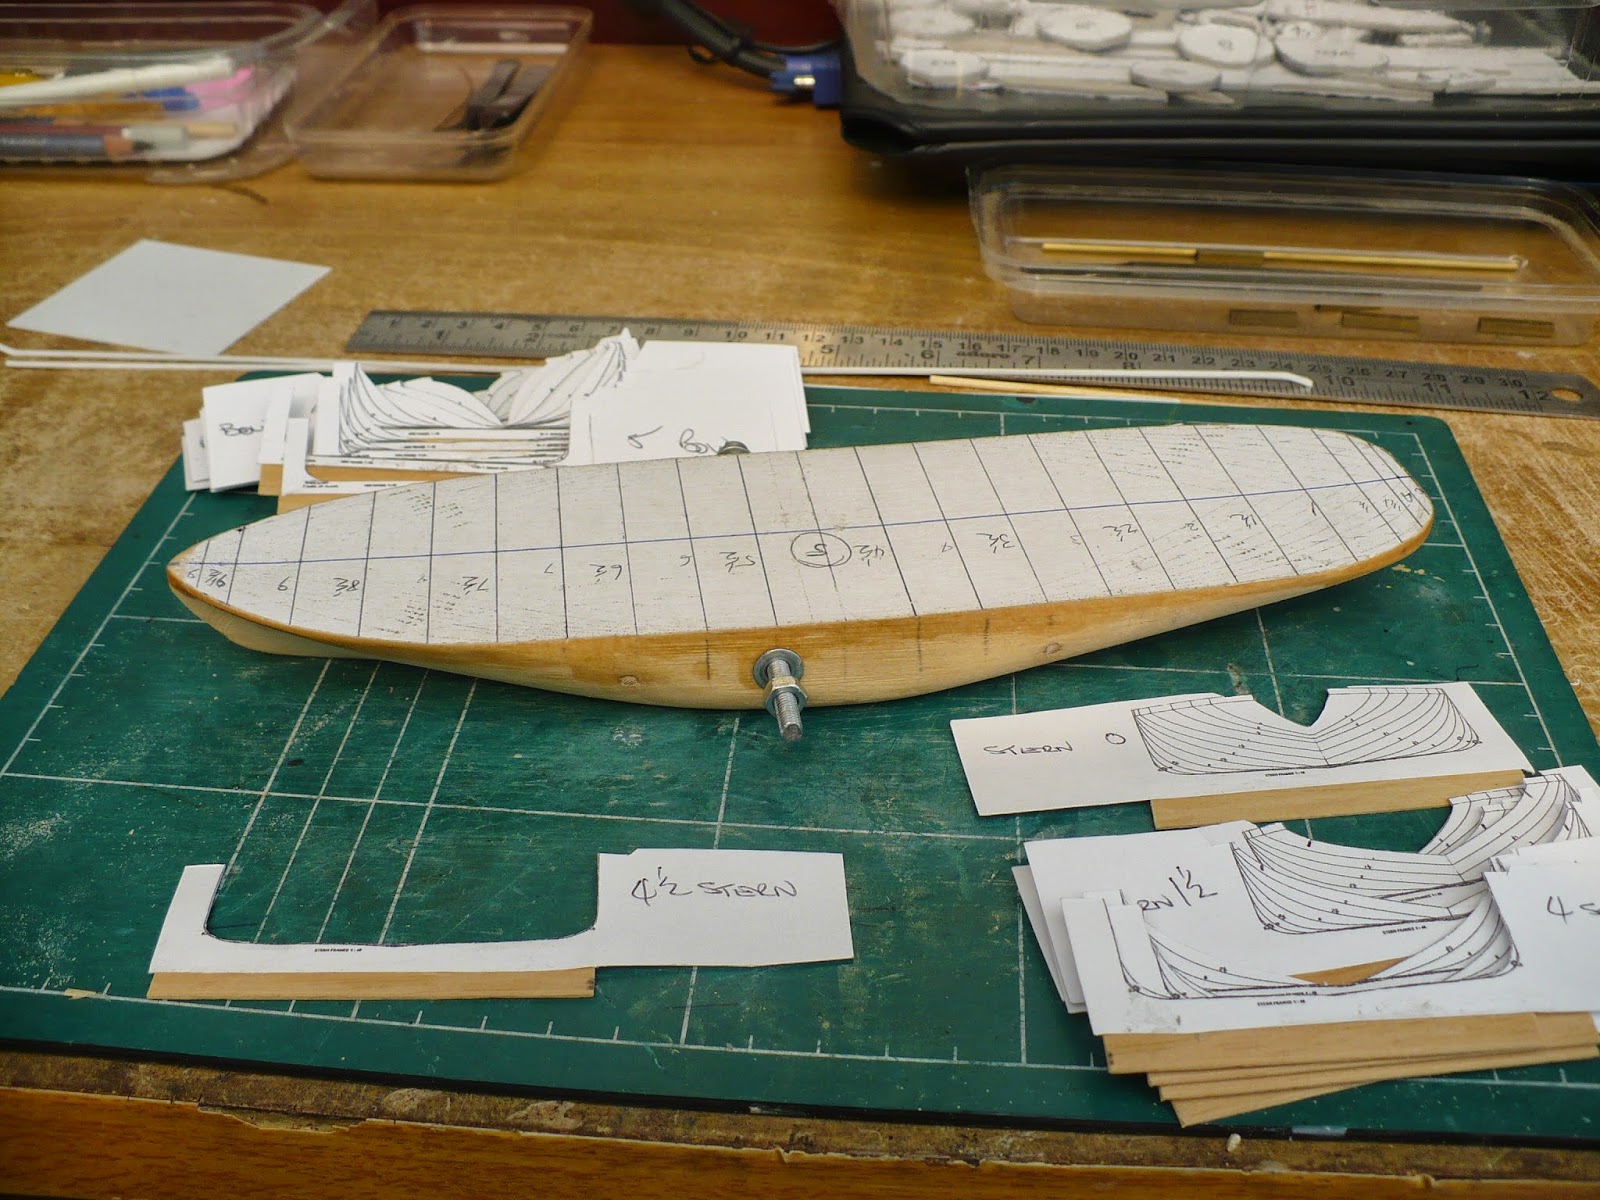
The hull was constructed in two halves, and joined
together with brass pegs.

The two parts of the hull were clamped together
temporarily.

The initial side profile was sanded to shape.

The top profile was then sanded to shape.


From the plans which were scaled down from the 1:48
model, templates were made for each rib and glued to scrap wood and cut out.
The rib positions were marked on the hull and then it was
sanded to the profile of each rib template.
The main deck was constructed with styrene in a similar
fashion to the big model and then glued to the hull.
The deck was then cut down the centre with a jeweller’s
saw. The deck cabins were then made, fitted and similarly cut down the centre.
The promenade deck was similarly constructed, glued down
then cut down the centre.

The promenade deck cabin was constructed and will be
fitted, together with the funnel and the bridge, after the boat is bottled.

The funnel was made similarly to the big model’s funnel by
using the plank on frame method and the bridge was made from Styrene and wire.

The next task was to line the base of the bottle with the
sea.
Here is how I do my sea in the bottle.
I used blue Plasticine and a 24 hour general purpose,
building construction, 2 part epoxy adhesive. The epoxy comes in 2 separate
tins and is mixed in a ratio of 2 parts adhesive and 1 part activator, by
volume. It has a pot life of 3 -6 hours so there is no rush to put it into the
bottle.

This epoxy is then mixed with the Plasticine in the ratio
of 1 part combined epoxy and 4 to 5 parts Plasticine. The Plasticine can be
heated on a bread plate in the microwave for 1 minute to soften it if necessary.

When the Plasticine and the epoxy are thoroughly mixed,
it is inserted into the bottle with a suitable spatula and pressed onto the
glass to form a thin even layer.


After 24 hours, the Plasticine has set solid and is
firmly stuck to the glass. A wooden plug from a piece of scrap wood is glued
onto it with epoxy, which will serve as a solid wooden base upon which to build
the framework for the sea surface.

A wooden framework was then glued onto the wooden plug.


A paper template with a grid pattern on it was then inserted
into the bottle.

The two hull pieces were then inserted and dry assembled.
The hull was placed in position on the grid and the grid co-ordinates of the
bow and stern centres identified.
The hull was then disassembled and removed and the paper
template removed. The outline of the paper template was traced on a piece of
2mm card and the position of the bow and stern co-ordinates marked on the card.
The hull was placed in position on the card and its outline marked.

The card was then cut into three pieces and inserted into
the bottle to check its fit.


The card was then removed, the hull placed on it and a
layer of plasticine lengths glued onto the card around the hull, and then
blended flat.


The pilings for the landing stage were then constructed
on the right hand piece of card.
The 3 piece false sea was then re-inserted into the bottle.
A paper template was made for the outline of the landing stage deck against the
inside right hand bottle wall and the piling positions marked.

The false sea was again removed, the hull placed on it
and the template used to draw the final outline of the landing stage between
the hull and the bottle wall.

The landing stage was then constructed and holes were
countersunk in the underside of this deck to match the location of the pilings.


The three pieces of the false sea were then re-inserted
into the bottle and glued into place on the wooden platform. The sea was then finished
off around the sides and neck of the bottle.

The
Landing stage.
The gangplank assemblies were constructed of various
sizes of brass rod/wire and then planked.
Bollards were fitted and railings made from some left
over photo-etched brass railings from a previous project.

I then obtained some 1/200 scale figures on the internet
for the ferry passengers. (These are Z scale railway figures).
These were glued onto the boat’s decks and the landing
stage.

Now
to start bottling.
A piece of paper was laid on top of the Plasticine in the
bottle to prevent contamination of the various parts of the boat.

The two hull parts, the promenade deck cabin, the bridge
and the funnel were then inserted.

The two parts of the hull were joined together and glued. When dry, the hull was glued in place on the card base.

The promenade deck cabin was then fixed in place and
clamped down until set.

The bridge was then located and glued, the funnel
glued in place and finally, the landing stage was glued in place.


The bottle cap had its centre cut out and a disc of
plastic from a CD case was glued in place.

No comments:
Post a Comment