A cross section of the hull of an Admiralty ship of the line
is the perfect shape to fully utilise the space inside a 4 litre bottle. One
side would be fully built and the other side would be an open view of the
interior.
From previous kits of wooden ships that I had built, I had accumulated
enough spare parts to fully do justice to the model. Among the parts were
sufficient belaying pins, cannons, gun carriages, gunports and covers.
From the plans of my “Amati” HMS victory, I scanned a copy
of the middle hull frame and resized it to fit the bottle.
I spent a couple of weeks figuring out how the hull sides
and decks would fit together and built my first attempt. I made many changes in
the process and finally decided to bottle it. It actually went together quite well;
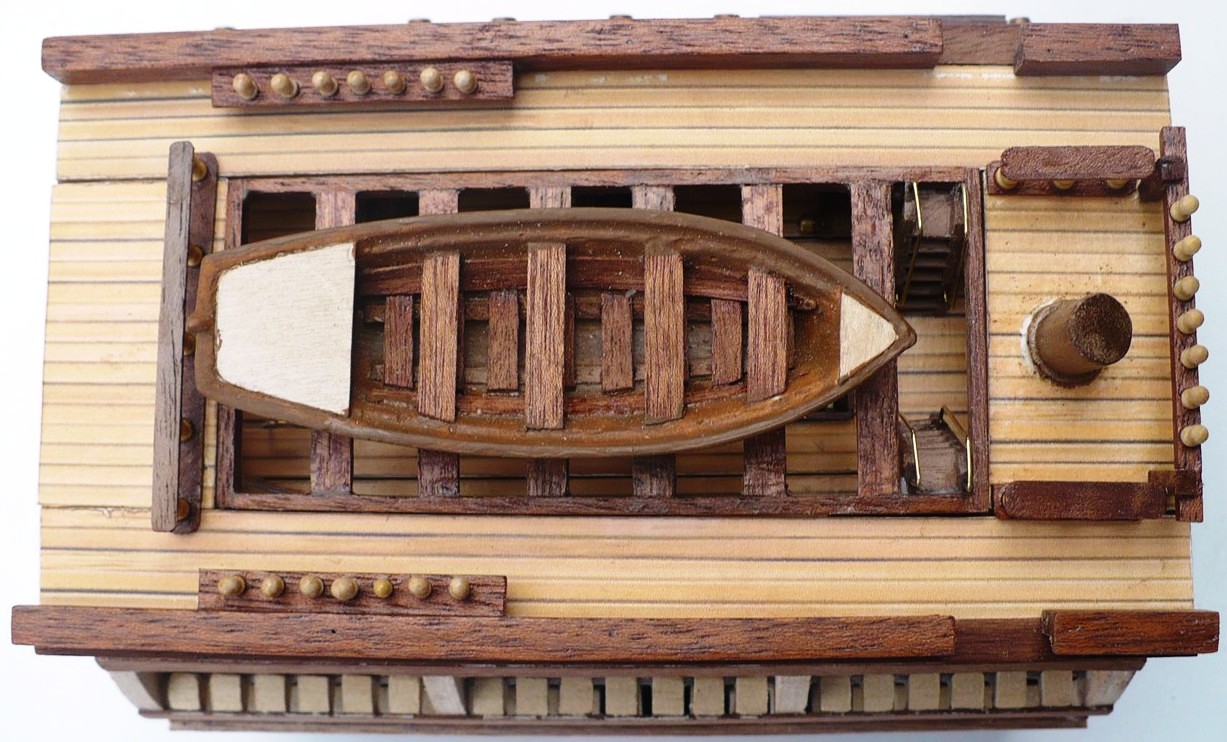
the only problem was the top deck and dinghy which, because they were above the
neck of the bottle, had to be modified so that they went in underneath their
supports and were fitted upwards, if you know what I mean!
This was the prototype.

I was not happy with the joins in the hull and deck pieces
(they were quite obvious), so I decided to break it down and remake the model.
Luckily I was able to break it up, including the base, and salvage the bottle.
I learnt a lot from the prototype, especially how the parts
went into the bottle. I redesigned the placement of the cuts in the hull sides where
the copper “tiles” were, so that they would be near the bottom of the hull
under the hull curvature and the upper side cuts were hidden by the overlapping
whales. I also redesigned the deck supports so that the deck beams were one
piece instead of three. I also added accessories to the top deck such as
belaying pin racks and a dinghy.

CONSTRUCTION
I printed out the frame templates and using tongue
depressors, I made four frames, each consisting of 3 overlapping layers.

A jig was made to hold the frames and the planking was
started.
As the planking progressed, mounting rails for each of the deck side pieces and end beams were fitted to the inside of the hull at each deck position.
As the planking progressed, mounting rails for each of the deck side pieces and end beams were fitted to the inside of the hull at each deck position.

The bottom deck was made in 3 pieces and crates made out of
card were fitted. (I copied the crates from my Sherman tank in a bottle). False
ribs were fitted in the open side and a length of box section was made for the
gunports. This was cut up into sections and they were fitted into the hull side
as the planking progressed.

The decks were now constructed. Each deck consisted of 3 lengths
of 1.5mm ply covered with a printed paper deck planking pattern. These were dry
fitted. The end beam of each deck was a single piece with the deck support
pillars fitted. The cannons were assembled on their gun carriages and glued in
place on the side deck pieces of the three gun decks. The main deck had the two
side pieces glued to the hull so that the centre deck piece could be fitted
from underneath and glued to the side pieces. This centre deck piece had the
dinghy fitted. The pieces at each end of the main deck piece were small enough
to be fitted from above the deck side pieces. Rails were fitted to the top of
the hull sides and belaying pin racks fitted.

Steps were fitted to the hull side around the entrances to
the middle gun deck and main deck.

The mast was in sections, each piece being glued onto the end
of the centre section of each deck. Ladder apertures were cut into each deck
centre strip and ladders glued in place.

DECONSTRUCTION
All the deck pieces were removed and each side of the hull
was cut into 4 pieces from the inside. (The bottom 2 pieces on each side had
previously been fitted with hinges during the construction stage).

Here are all the parts disassembled, ready for painting,
fitting the gunport frames and lids, and then bottling.


The copper tiles on the hull were created with self-adhesive
copper foil tape.

The nails were formed using a jig and a dressmakers tracing wheel from a fabric shop. The tape was divided into tile lengths by pressing a Stanley blade into the foil at intervals.

The nails were formed using a jig and a dressmakers tracing wheel from a fabric shop. The tape was divided into tile lengths by pressing a Stanley blade into the foil at intervals.


BOTTLING
The location of the mounting base was carefully measured and
marked with masking tape on the outside of the bottle.
The base was then glued in the bottle using the masking tape
as a guide.


Using 24hr epoxy, part 2 of each side was hinged down; glue was applied to the joins and then parts 1 & 2 of each side glued to each other
along the joins. The lower deck end pieces were glued in place and the deck
beams for the lower gun deck were dry fitted to act as alignment spacers and
the sides clamped until the glue had set.

Once the glue had set, the gun deck frames were removed and
the bottom deck pieces glued into place.

The lower gun deck frames were dry fitted as spacers and the
middle hull side pieces glued into place with 24hr epoxy. The middle and top gun
deck beams were also dry fitted to act as spacers and again the sides were
clamped until dry.

When dry, all the dry fitted beams were removed and the lower gun deck beams glued in place and the deck pieces fitted and glued.
When dry, the middle gun deck was fitted in the same manner.

The upper hull sides were now glued into place and the upper
gun deck beams and main deck beams dry fitted to act as spacers and the sides
were again clamped until dry.

The upper gun deck and beams were now glued in place.

Finally, the main deck pieces were fitted and glued.


No comments:
Post a Comment